0%

Selecting a 2.7mm LCP Distal Radius Volar Rim Plate requires more than matching a plate to a radiograph. The volar rim is small, irregular, and close to important tendons and neurovascular structures. A suitable implant should follow the patient’s anatomy without excessive prominence. It should also support the specific fracture fragments that need control.

Careful planning begins with high-quality imaging, often including computed tomography for complex intra-articular fractures. The surgeon should assess fragment size, displacement, bone quality, watershed-line position, and the planned screw trajectories. Plate width, contour, hole arrangement, and available locking options also matter. A compact plate may improve rim capture, but limited space can complicate screw placement. More coverage is not always better. It may increase soft-tissue irritation if the plate sits too distally or does not match the bone.

Practical selection benefits from experience with reduction techniques, instrumentation, and postoperative follow-up. The manufacturer’s surgical technique and approved indications should guide final decisions. A checklist helps, but it is not infallible. Even experienced teams can overlook a small lunate facet fragment or an unsuitable screw angle. Intraoperative fluoroscopy, direct assessment of plate fit, and attention to tendon clearance remain essential. The best choice balances fixation strength, fragment-specific control, anatomical fit, and soft-tissue safety. This article outlines the main factors for making that decision carefully, while recognizing that every wrist presents different challenges.
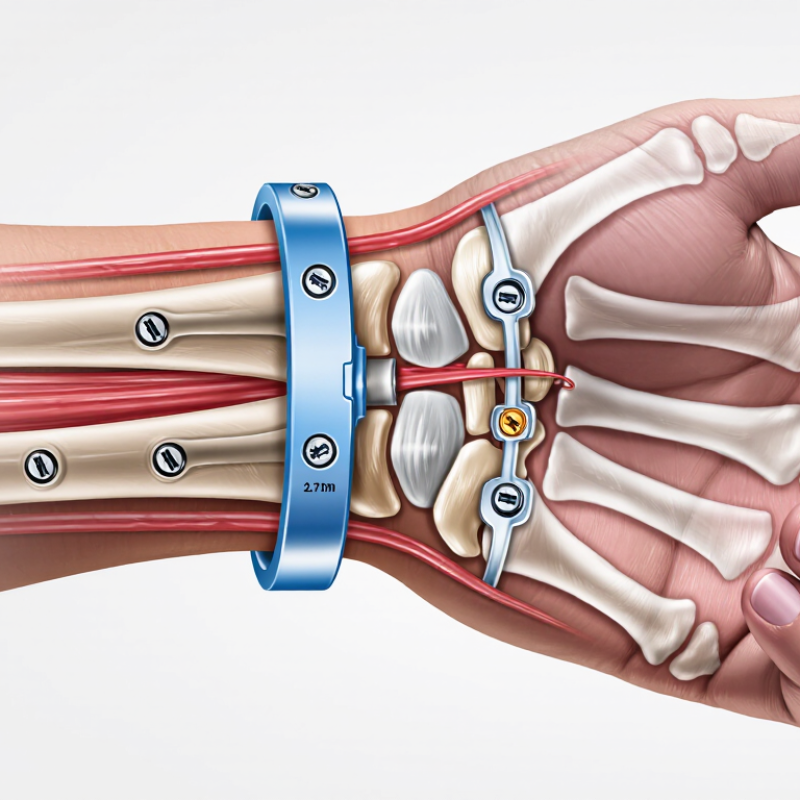
How to Select a 2.7mm LCP Distal Radius Volar Rim Plate

Define the Indications for a 2.7 mm LCP Distal Radius Volar Rim Plate

A 2.7 mm LCP distal radius volar rim plate is designed for fractures close to the joint surface. Its indication depends on fragment position, stability, and soft-tissue conditions.

It may be appropriate for small volar marginal fragments, including displaced volar lunate facet fragments. These fragments can support the carpus and influence radiocarpal alignment. Standard volar plates may sit too proximal to capture them securely. The rim plate allows fixation nearer the articular margin, using carefully directed locking screws.

Standard volar plates may sit too proximal to capture them securely.

CT imaging is often valuable before surgery. Plain radiographs may hide fragment separation, joint impaction, or sigmoid notch involvement. The surgeon should assess bone quality, fragment size, tendon coverage, and screw clearance. A very small fragment may not hold a screw safely. In that situation, another fixation method may be more reliable.

The plate is not automatically indicated for every distal radius fracture. It should be considered when the volar rim fragment threatens reduction or joint stability. Intraoperative fluoroscopy must confirm that screws remain outside the joint. This step matters.

Clinical judgment still has limits. A plate can appear well positioned while soft-tissue irritation remains possible. I would reassess the plan when swelling, poor bone stock, or an unreconstructable fragment changes the risk profile. Careful reduction, stable fixation, and postoperative monitoring remain essential.

Assess Fracture Anatomy and Distal Radius Fragment Support

Selecting a 2.7mm LCP distal radius volar rim plate starts with fracture anatomy, not plate preference. Review true lateral, oblique, and computed tomography images when fragments overlap. Identify marginal rim pieces, die-punch defects, coronal splits, and articular depression. Small details matter. A fragment near the volar rim may appear stable, yet collapse after reduction.

Assess how much distal bone can support each screw. The plate should capture the rim fragment without extending excessively beyond the watershed line. Check the relationship with the distal radioulnar joint and the flexor tendon path. A very distal plate position may improve fragment control, but it can increase soft-tissue irritation. That trade-off deserves careful discussion.

During surgery, confirm reduction with fluoroscopy from several angles. Use a temporary wire to test whether the plate holds the fragment before final fixation. Poor bone quality may require broader subchondral support, while a thin fragment may not tolerate aggressive drilling. I have found that relying on one lateral image is an easy mistake. The screw may look safe there, but an oblique view can reveal joint penetration. Plate selection should remain adaptable when the fracture behaves differently than imaging predicted. The anatomy decides.

Match Plate Design, Size, and Screw Options to the Injury

Selecting a 2.7 mm LCP distal radius volar rim plate begins with the fracture map, not the implant tray. Review AP, lateral, and oblique radiographs, adding CT when fragments overlap. Identify marginal rim fragments, die-punch pieces, radial styloid involvement, and metaphyseal comminution. Fit matters.

A rim plate should support the distal fragment without sitting too far distal. Excessive prominence may irritate flexor tendons, while a proximal position may miss the lunate facet. Compare plate width with the patient’s radius and fracture spread. A narrow design may suit a small fragment pattern. Broader coverage can help when the articular surface is divided. Bone quality also matters. Osteoporotic bone may need more fixed-angle support, but excessive screw density can obstruct reduction.

Choose screw options according to fragment size, trajectory, and joint safety. Fixed-angle screws can support subchondral bone, while variable-angle options may capture fragments from unusual directions. Confirm screw length with fluoroscopy and multiple views. One image can mislead. Leave enough purchase without placing screw tips beneath the cartilage. A seemingly perfect fit may become less convincing after swelling changes exposure. Recheck the watershed relationship, tendon clearance, and reduction before closure. Small adjustments can matter. Final decisions belong to a qualified orthopedic surgeon using the patient’s anatomy, imaging, and intraoperative findings.

Verify Surgical Fit, Position, and Soft-Tissue Safety

How to Select a 2.7mm LCP Distal Radius Volar Rim Plate

Verify Surgical Fit, Position, and Soft-Tissue Safety

Selection begins with anatomy, not the catalog. A 2.7mm volar rim plate should match the distal fragment’s width, curvature, and available bone. The plate must support the lunate facet without extending excessively beyond the watershed line. Preoperative radiographs, and CT when comminution is substantial, help define that relationship. The 2020 AAOS/ASSH Clinical Practice Guideline notes that fixation choices should reflect fracture pattern, patient factors, and surgeon judgment. A perfect-looking plate can still be wrong.

Position deserves repeated checking. Use true lateral fluoroscopy to confirm that screws remain outside the radiocarpal joint. Check the plate edge against the volar rim in multiple wrist positions. Do not trust one image. A systematic review of volar plating complications reported flexor tendon problems in roughly 2% of cases, with ruptures occurring below 1%. These figures are uncommon, but preventable prominence remains clinically important. The distal edge should not irritate the flexor tendons during passive finger motion. Leave no sharp transition.

Soft-tissue safety is practical, not theoretical. Confirm smooth tendon gliding before closure. Reassess screw length after reduction changes. The 2020 guideline also highlights limited high-certainty evidence in several distal radius decisions. That matters. It means experience must be checked against imaging, not confidence. My own preference would be to pause when the rim fragment is small; a plate that looks secure may compromise tendon clearance.

How to Select a 2.7mm LCP Distal Radius Volar Rim Plate - Verify Surgical Fit, Position, and Soft-Tissue Safety

Evaluation Dimension Practical Selection Data How to Verify Safety or Fit Consideration
Intended fracture pattern Designed for distal radius fractures with a very distal volar fragment, volar marginal rim involvement, or loss of support at the volar lunate facet. Review standard radiographs and CT when the fracture extends into the radiocarpal or distal radioulnar joint. A rim plate is not automatically suitable for every distal radius fracture; confirm that the plate can capture the specific fracture fragments.
Nominal plate size 2.7 mm nominal system or plate designation, subject to the manufacturer’s technical documentation and actual plate geometry. Confirm the nominal thickness, width, length, hole configuration, and compatible screw sizes in the current instructions for use. Nominal size does not describe every dimension. Check the complete implant specification before surgery.
Distal fragment capture Look for multiple distal locking options that can support the volar rim, lunate facet, and other key subchondral fragments. Overlay the plate on fluoroscopic images or a three-dimensional CT reconstruction; assess screw trajectories in the sagittal and axial planes. Avoid relying on a single screw to control a small or rotated marginal fragment.
Volar rim coverage The distal contour should sit close to the volar margin while maintaining adequate coverage of the intended fracture zone. Assess the plate on a true lateral view and oblique views; compare the distal plate edge with the watershed region. A plate placed too distally or prominent beyond the watershed area may increase flexor tendon irritation risk.
Plate contour and bone contact The plate should conform to the patient’s volar distal radius without excessive rocking, lifting, or focal edge prominence. Check fit on the prepared bone and confirm that contouring, if permitted, does not deform locking holes or compromise the locking mechanism. Do not force a poorly fitting plate into position; excessive bending can affect screw engagement and fixation geometry.
Screw compatibility Use only the locking and non-locking screw diameters, lengths, and thread profiles specified for the selected plate system. Check the implant tray, screw gauge, drill guide, and current instructions for use before insertion. Cross-compatibility between different systems must not be assumed, even when nominal dimensions appear similar.
Subchondral screw placement Distal screws should support the articular fragments while remaining extra-articular and appropriately short for the patient’s anatomy. Use multiple fluoroscopic views, including true lateral, oblique, and tilt views; inspect the joint surface directly when indicated. Screw length and trajectory are patient-specific. A screw that appears safe on one projection may penetrate the joint on another.
Dorsal cortex clearance The selected screw lengths should match the measured volar-to-dorsal bone depth without unnecessary dorsal protrusion. Measure with the appropriate depth gauge and confirm on lateral and dorsal tangential fluoroscopic views. Dorsal screw prominence can irritate or injure extensor tendons, particularly when the dorsal cortex is irregular.
Flexor tendon clearance The plate should remain flush to the volar surface and avoid unnecessary distal or radial prominence in relation to the flexor tendons. Assess the plate edge clinically and radiographically; verify that the distal contour does not project excessively beyond the watershed region. Persistent postoperative flexor irritation, pain, or tendon dysfunction requires clinical assessment and should not be ignored.
Pronator quadratus coverage Preserve soft-tissue coverage when possible and avoid unnecessary disruption during exposure and closure. Confirm that the plate does not require excessive retraction or sit in a position that prevents appropriate soft-tissue coverage. Soft-tissue handling is part of implant safety; plate selection alone cannot eliminate tendon-related complications.
Bone quality and fixation strategy Locking fixation may be useful in osteoporotic or metaphyseal bone, while the number and distribution of screws should reflect fracture stability. Evaluate bone stock, comminution, fragment size, and the available number of secure screw purchase points. A locking plate does not compensate for inadequate reduction, poor screw placement, or insufficient fixation of the main fragments.
Plate length and proximal fixation Select a length that provides adequate proximal fixation while avoiding unnecessary soft-tissue exposure or interference with the distal radioulnar joint. Confirm the proximal plate position on the radius and ensure that all planned screws have sufficient bone purchase. Very short or poorly positioned plates may reduce fixation options; excessive length may increase dissection and prominence.
Distal radioulnar joint relationship The implant and screws should not obstruct the distal radioulnar joint or interfere with planned restoration of ulnar variance and radial alignment. Review AP, lateral, and oblique imaging after provisional placement and final fixation. Check joint congruity, sigmoid notch alignment, radial height, inclination, and volar tilt as part of the overall assessment.
Intraoperative imaging plan Plan more than one fluoroscopic projection because the distal radius has complex three-dimensional anatomy. Use AP, true lateral, oblique, and additional tangential or tilt views when required to evaluate screw tips and plate prominence. A single fluoroscopic view is insufficient to reliably exclude intra-articular or dorsal screw penetration.
Sterilization and instrumentation Confirm that the required drill guides, depth gauges, screwdrivers, reduction tools, and sterilization configuration are available. Complete a preoperative tray and implant checklist using the current technical documentation. Instrument mismatch or missing guides can lead to incorrect drilling, inaccurate measurement, or improper locking.
Final acceptance criteria Accept the construct only when reduction, plate fit, screw position, joint clearance, and soft-tissue profile are satisfactory. Document final radiographs and confirm that no screw enters the radiocarpal or distal radioulnar joint. The operating surgeon must make the final decision based on patient anatomy, fracture morphology, imaging, and the applicable instructions for use.
Clinical note: Dimensions, screw compatibility, bending limits, and approved indications vary by implant system. Always verify the current instructions for use and apply surgeon judgment to the individual patient.

Review Implant Compatibility and Postoperative Management Needs

Selecting a 2.7mm LCP distal radius volar rim plate requires more than matching the plate to the fracture. Implant compatibility must be checked before opening the tray. Confirm screw diameter, thread design, locking function, and available lengths. The plate should match the patient’s rim anatomy without excessive prominence. A few millimeters matter near the flexor tendons. Review radiographs and, when necessary, CT images to assess fragments, bone quality, and joint involvement.

Instrument compatibility also deserves careful attention. The drill guides, depth gauges, screwdrivers, and reduction tools must correspond with the plate system. Mixing components without verified compatibility can create avoidable problems. I would not treat a catalog description as sufficient evidence. The surgical team should confirm approved combinations, sterilization requirements, and backup options before incision. Small omissions become stressful during fixation.

Postoperative management should begin during implant selection. A prominent volar rim plate may require closer observation for tendon irritation, wound problems, or reduced wrist motion. Document tendon function and neurovascular status after surgery. Use follow-up imaging to evaluate alignment, healing, and screw position. Early controlled motion may be appropriate, but loading should reflect fixation stability, bone quality, and the patient’s healing response. Not every patient follows the expected timeline. The plan may need revision when swelling, stiffness, pain, or delayed healing appears.

Typical planning and postoperative time windows for a 2.7 mm distal-radius volar rim plate. Confirm plate geometry, rim-fragment coverage, screw diameter, locking-thread compatibility, and fluoroscopic clearance before implantation. Timing should be adjusted according to fixation stability, soft-tissue healing, radiographs, and the treating surgeon’s protocol.

FAQS

When may a 2.7 mm locking volar rim plate be considered?

It may help fix small volar rim fragments near the wrist joint. These fragments can affect carpal support and joint alignment. It is not suitable for every distal radius fracture.

Which fracture patterns may benefit from this plate?

Possible patterns include displaced volar lunate facet fragments and marginal rim pieces. Die-punch defects, coronal splits, and joint depression also require careful assessment. Small details matter.

Why is computed tomography useful before surgery?

Computed tomography can show hidden fragment separation, joint impaction, and sigmoid notch involvement. Plain radiographs may not reveal overlapping fragments clearly. Better imaging can change the fixation plan.

How should the surgeon assess the fragment before choosing fixation?

The surgeon should assess fragment size, position, stability, and bone quality. A very thin fragment may not safely hold a screw. Another fixation method may be more reliable.

How does plate position affect tendon safety?

The plate should capture the fragment without excessive prominence beyond the watershed line. A very distal position may improve control but irritate flexor tendons. Tendon clearance matters.

What screw choices require special attention?

Screw direction and length should match the fragment and available bone. Fixed-angle screws can support subchondral bone. Variable-angle screws may help reach unusual fragments. Do not place screw tips inside the joint.

Why are multiple fluoroscopic views needed during surgery?

A single lateral image can create false confidence. Oblique views may reveal joint penetration or incomplete reduction. Temporary wiring can test plate stability before final fixation. One view is not enough.

When should the fixation plan be reconsidered?

Reconsider it when swelling, poor bone stock, or an unreconstructable fragment changes the risks. The fracture may behave differently than the scans suggested. I would not ignore that mismatch. Final decisions require a qualified orthopedic surgeon.

Conclusion

Selecting a 2.7mm LCP Distal Radius Volar Rim Plate begins with confirming that the fracture pattern requires stable support of the volar rim, especially when small, distal, or marginal fragments may be difficult to control with a standard plate. Careful assessment of fracture lines, fragment size, bone quality, joint involvement, and the level of comminution helps determine whether this plate design is appropriate and where support is most needed.

The surgeon should then match the plate’s shape, length, contour, and screw options to the patient’s anatomy and injury. Before fixation, verify that the plate sits securely along the volar rim without extending into the joint or causing excessive prominence near tendons and other soft tissues. Screw trajectory, purchase, and subchondral support should be checked with appropriate imaging. Final selection should also consider compatibility with available instruments and implants, as well as postoperative plans for radiographic monitoring, wrist protection, rehabilitation, and soft-tissue observation.

Amelia

Amelia

Amelia is a dedicated marketing professional with a deep understanding of the company’s products, customers, and evolving market needs. Through a combination of strategic insight, clear communication, and practical industry knowledge, she helps transform complex product information into valuable......